The Fridge Screen
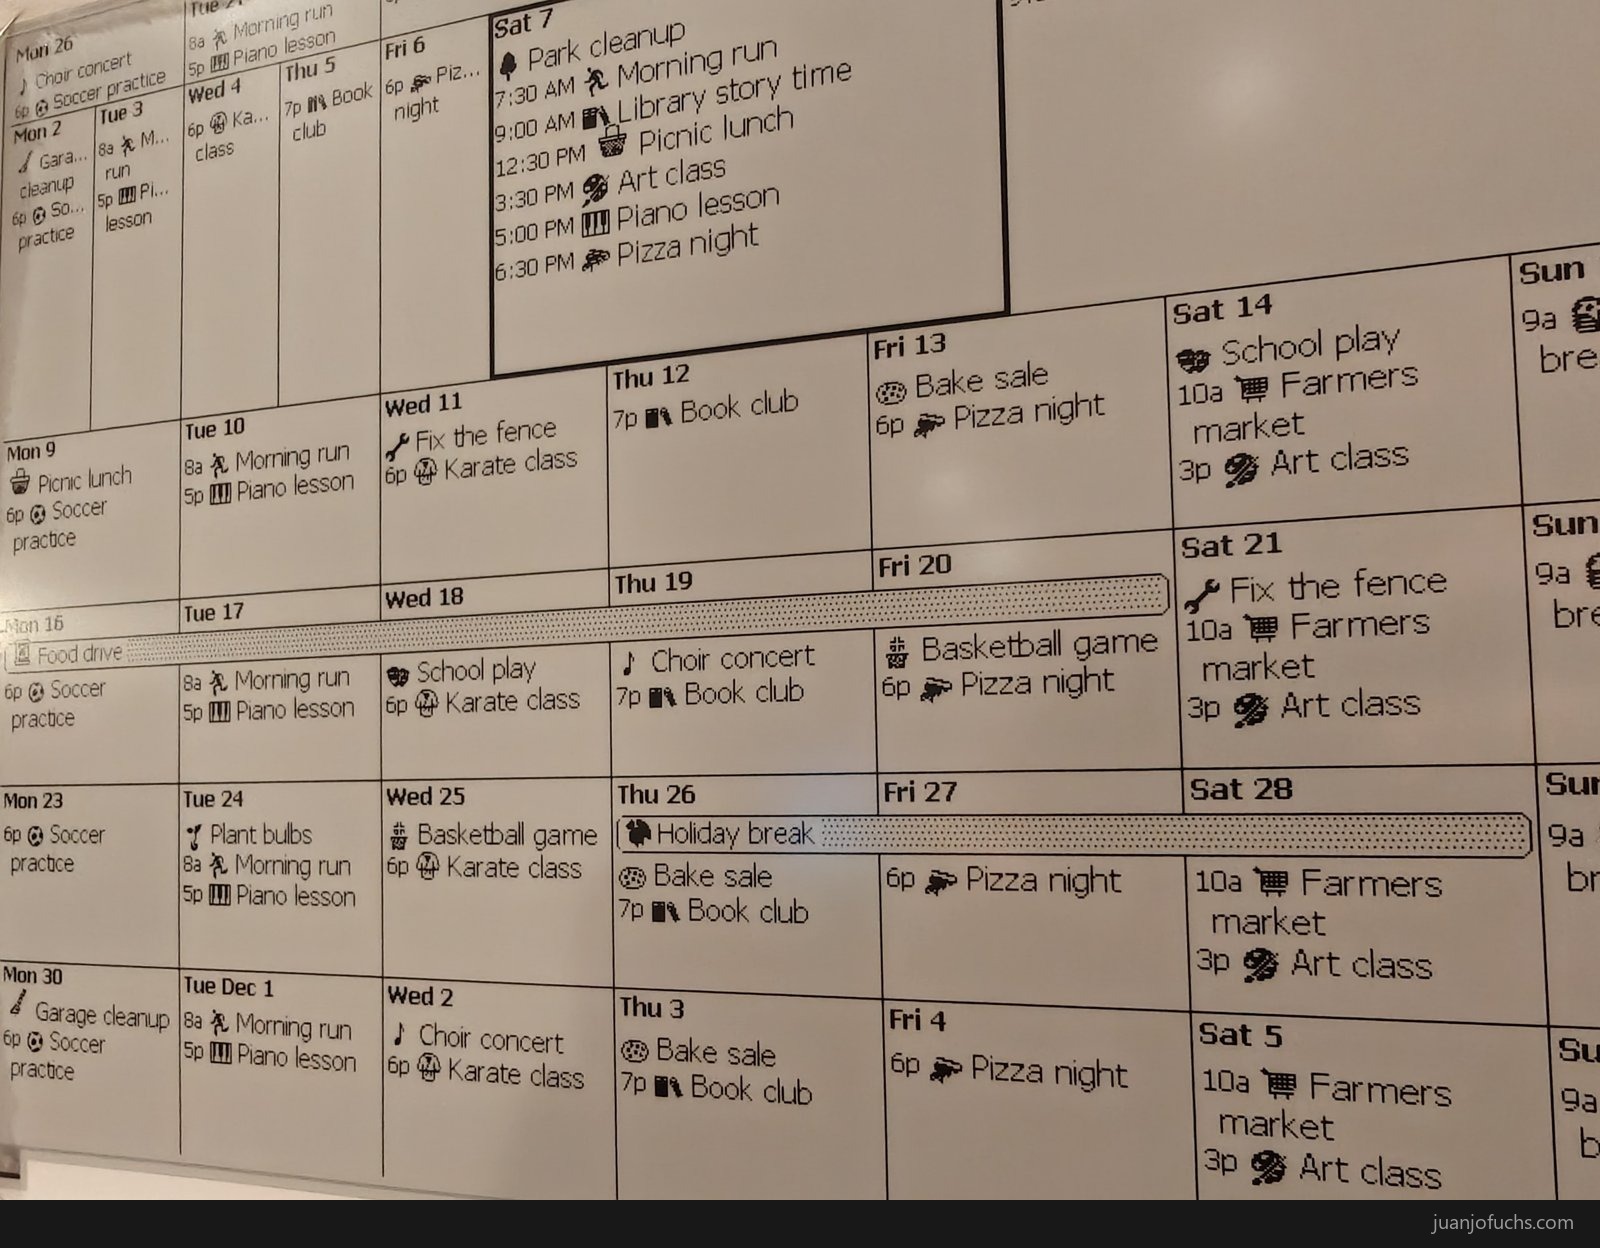
A calendar on the fridge
I have wanted to display my family calendar on the fridge for quite a while. I was looking for options that don’t draw a lot of power and are not too flashy, and I was reading about e-ink displays. Last weekend, with my agents’ help, I was finally able to do it. My agents guided me into finding the hardware, comparing the alternatives, purchasing them and then putting them all together, soldering and programming the software.
Why I wanted to build it
I am a builder. I have always been a builder. And before AI, I built software with my hands, I typed each letter into the keyboard and produced the code manually. But now that AI is here, we can use our voice and actually just speak things into existence, without having to use the keyboard at all. However, I have realized that I still have that need to create something with my hands. And something that AI can’t yet do for us is hardware in the physical world. That’s one of the reasons I wanted to try to do this hardware project.
I had done research and found some consumer products, for example TRMNL, which I liked very much. But I didn’t want to buy a finished product nor get into that ecosystem, even though it has bring your own device, build your own server and other stuff. I wanted to build something myself that I could fully control. Basically, I wanted to hack something together myself.
We have a personal teacher now
With AI agents we have a personal teacher now, a teacher that never gets tired of our questions, no matter how obtuse they are, and can walk us through basically anything. If we make good use of the AI and provide the right context, we can get an expert’s help doing real-world stuff. It lowers the entry barrier into anything new and unknown, and it gives you confidence.
When I decided I wanted to do this project, my agents and I researched some e-ink displays and settled on the Waveshare 13.3-inch e-Paper HAT (K). The idea was to use my Raspberry Pi, a very old one that’s been sitting in a drawer for years. But when we were walking through the build, I discovered that the Raspberry Pi would draw too much energy, defeating the purpose of having something that could run autonomously for months without needing to be recharged or plugged in. Then we researched more options and the ESP32 board, a tiny computer board to run the screen, came along, together with the battery. After that iteration, walking through the setup, we realized I didn’t have a soldering kit nor a multimeter.
Neither the AI nor I came up with the design in one shot, nor alone. We went through multiple iterations to evolve it based on what I had and what I wanted. I think the key piece here is iteration, and for iterations to be valuable and additive we need to convey our intent as best as possible, so that the AI knows what we want and can give us back as much understanding as possible. I wrote about it in a previous post and called it intent per minute and understanding per minute.
The way I would iterate through this, when all the parts came, is that I would take pictures of the parts and send them to my agents through Command Bridge, the tool I built to talk to them by voice, and my agents would just talk back to me with the instructions on how to set them up. They showed me how to connect the circuitry, they drew a front view of the board, and they even walked me through step by step on how to do the soldering.
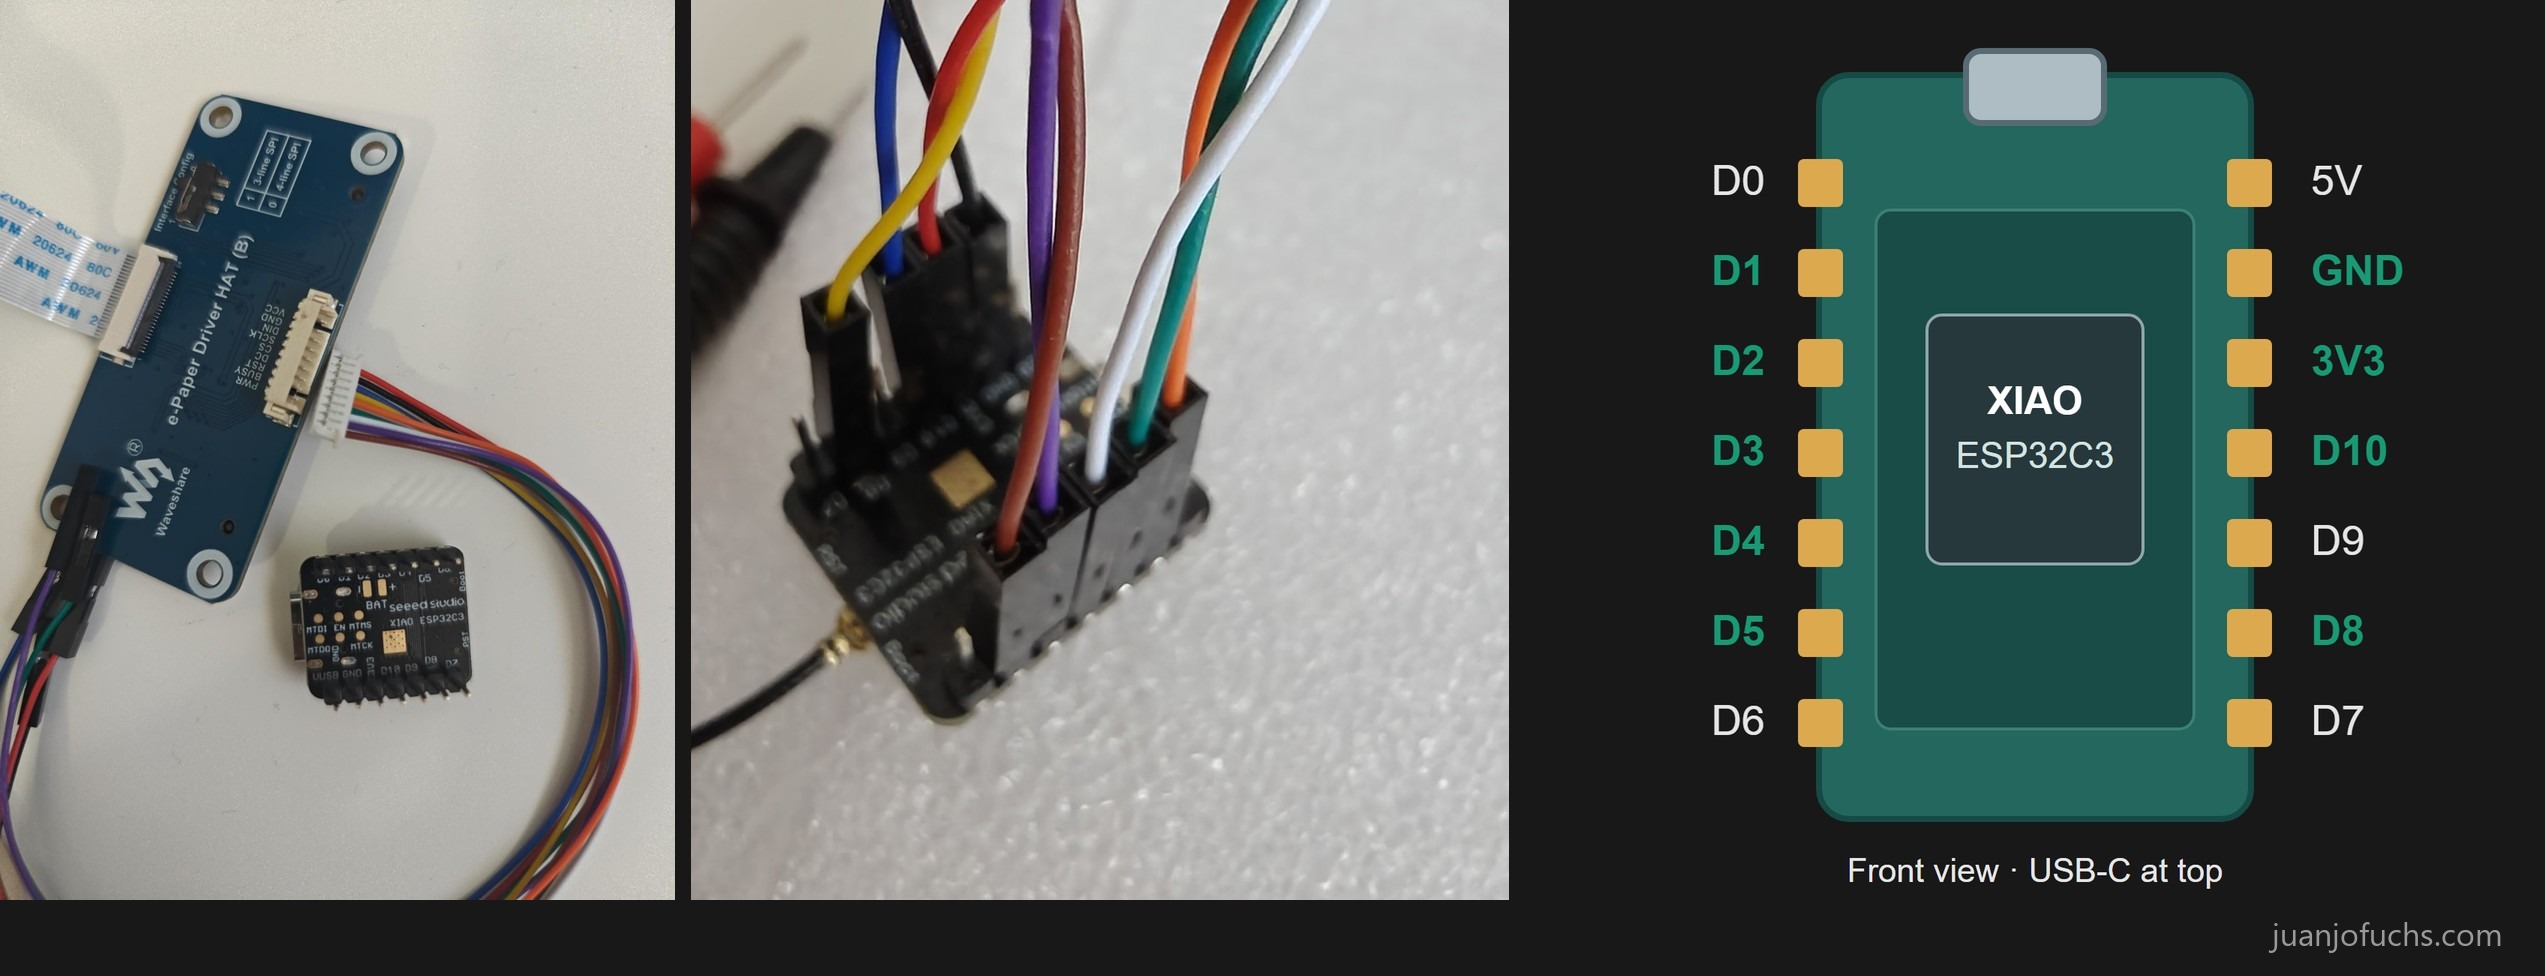
When I realized the battery connection needed soldering, I did wonder if I should buy Seeed’s expansion board, which has a battery socket and would have saved me the soldering, but I chose soldering because I figured the skill would be useful in the future, rather than just solve it by buying more stuff. I was nervous though, I didn’t want to mess up the circuitry. I had tried soldering once many years ago, joining two cables, and didn’t do a proper job, and I had never done it on a circuit board. I had never used a multimeter either, so my agents walked me through all of it: measuring and making sure the polarity of the battery was right, how to use the iron and how to solder the cables onto the board, then measuring afterwards to make sure the soldering was right. And about half an hour later, the system was alive. That was fun.
I wondered if this had a name. It’s called scaffolding, a process that “enables a child or novice to solve a problem, carry out a task or achieve a goal which would be beyond his unassisted efforts.” The tutor takes care of the parts of the task that are beyond you at first, so you can concentrate on the parts you can do and still finish it. That’s what my agents did for me with the pins and the order of the steps.
The finished build
I used the foam pads the screen came with to build its case, with magnets glued to the back so it sticks to the fridge. I don’t have a 3D printer, but if I get one soon I’ll be able to print a nicer casing for this.
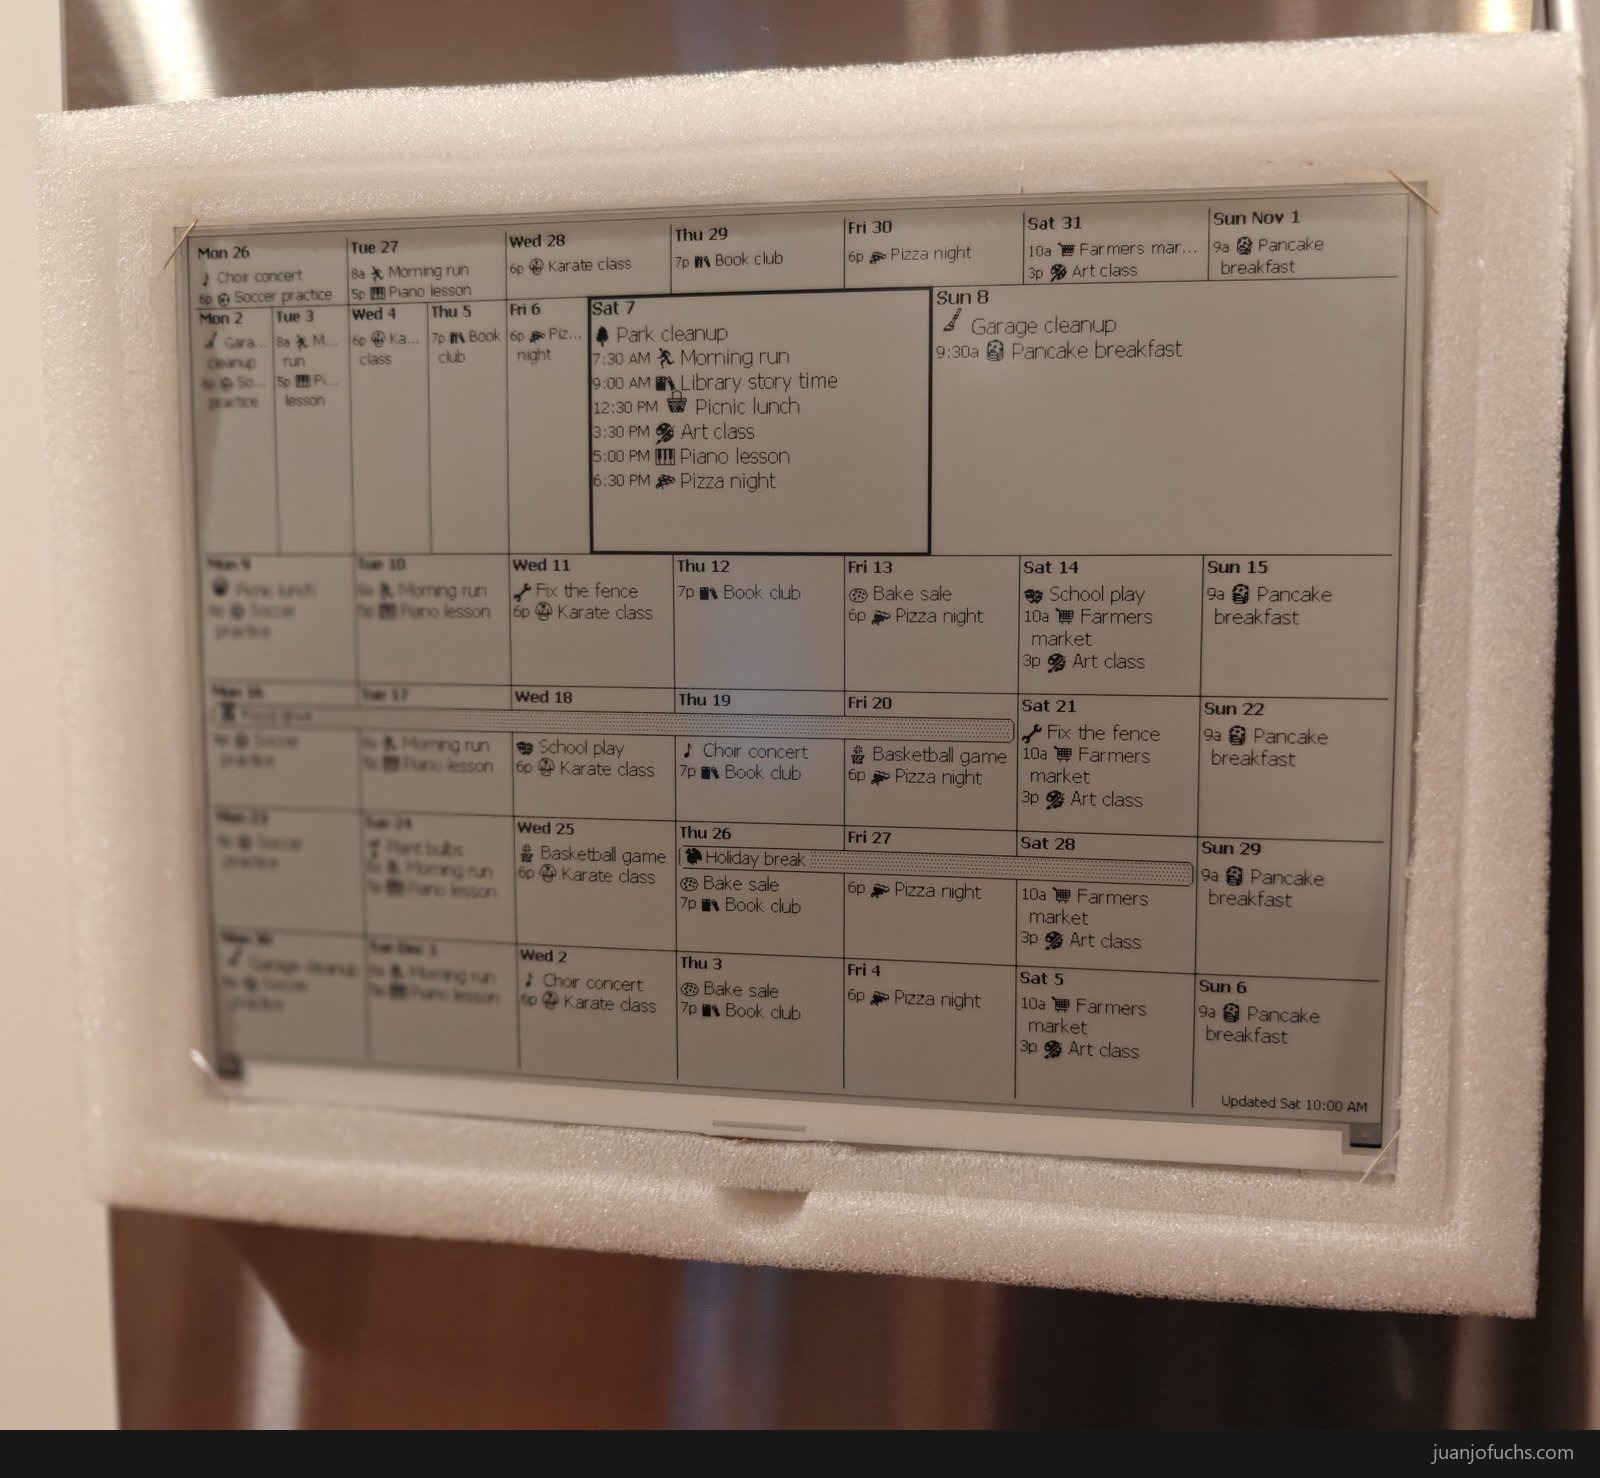
Building my own software gave me control over the design, and this is how I wanted to design it. I wanted the calendar to give more height to this week and to today and to shrink past days, so the full month is still displayed but upcoming things get more focus. It keeps the emojis from our family calendar, and it shows the weather, with icons, feels-like highs and lows, and the current temperature. At night when we’re asleep there’s no need to update it, so I added quiet hours to extend the battery life.
With my agents’ help I made a small Python server that runs on my home box and serves the frames and the sleep time to the ESP board, which it uses to update the display and go into deep sleep until the scheduled time.
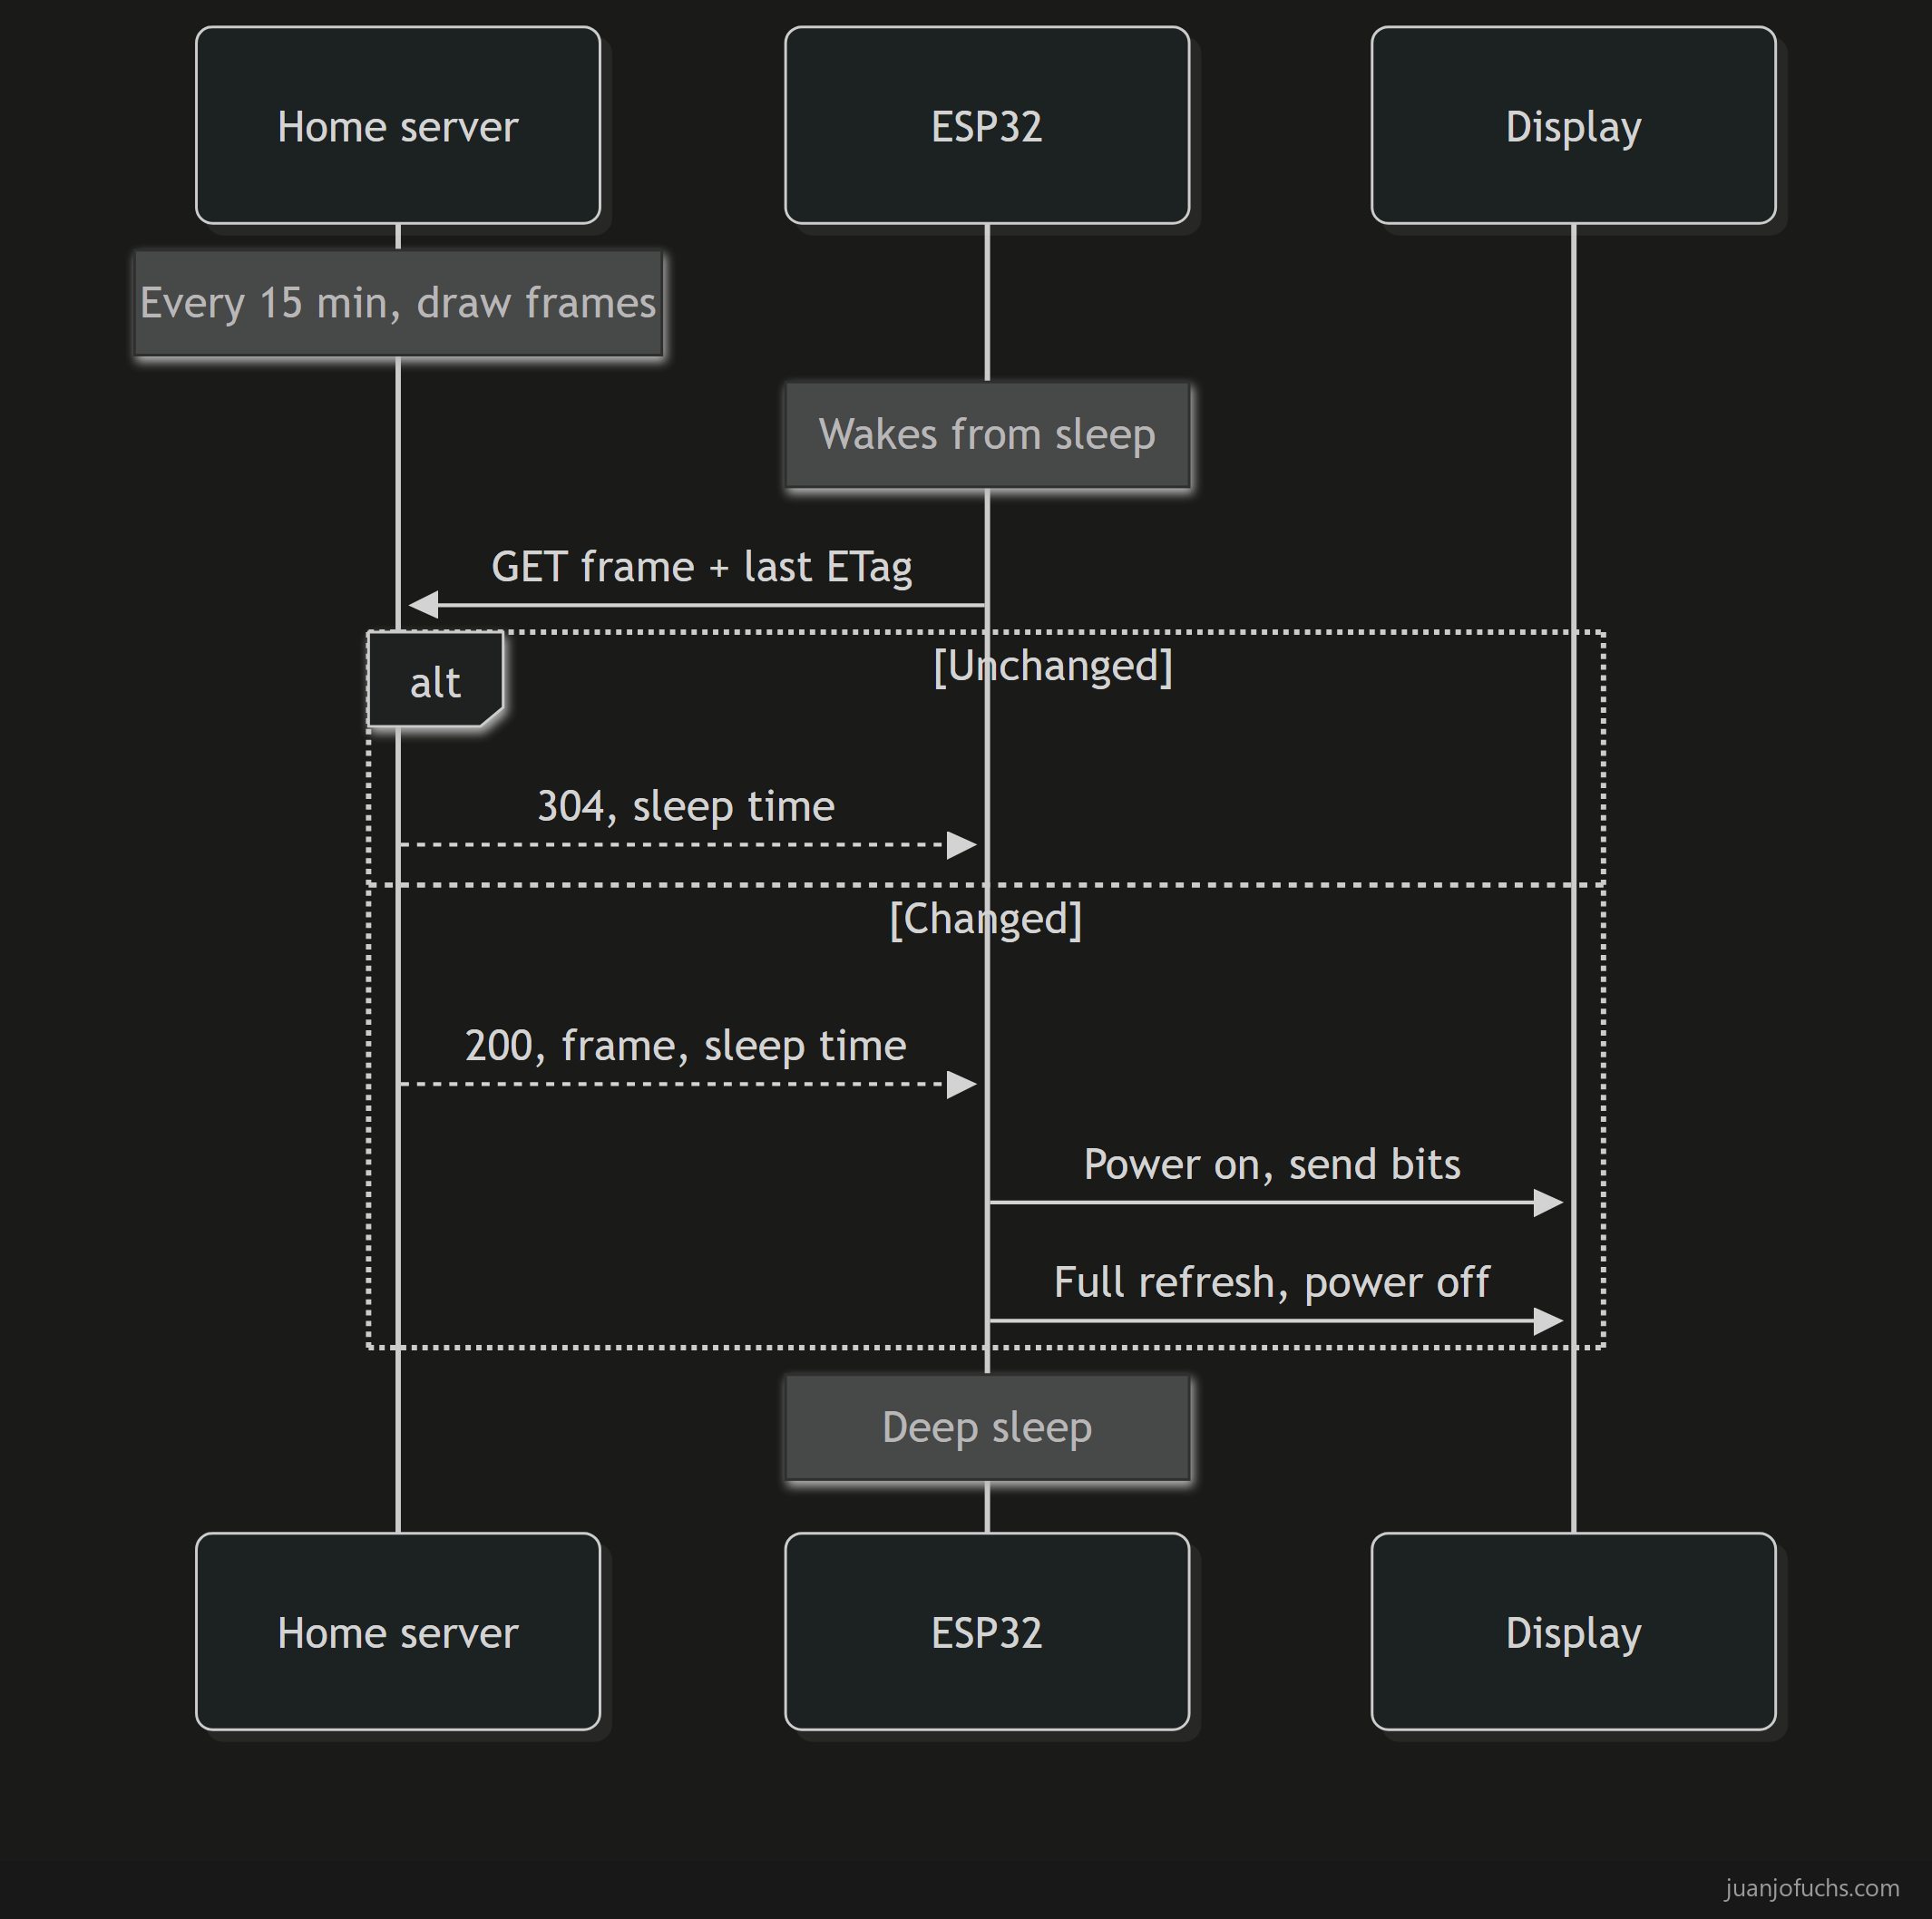
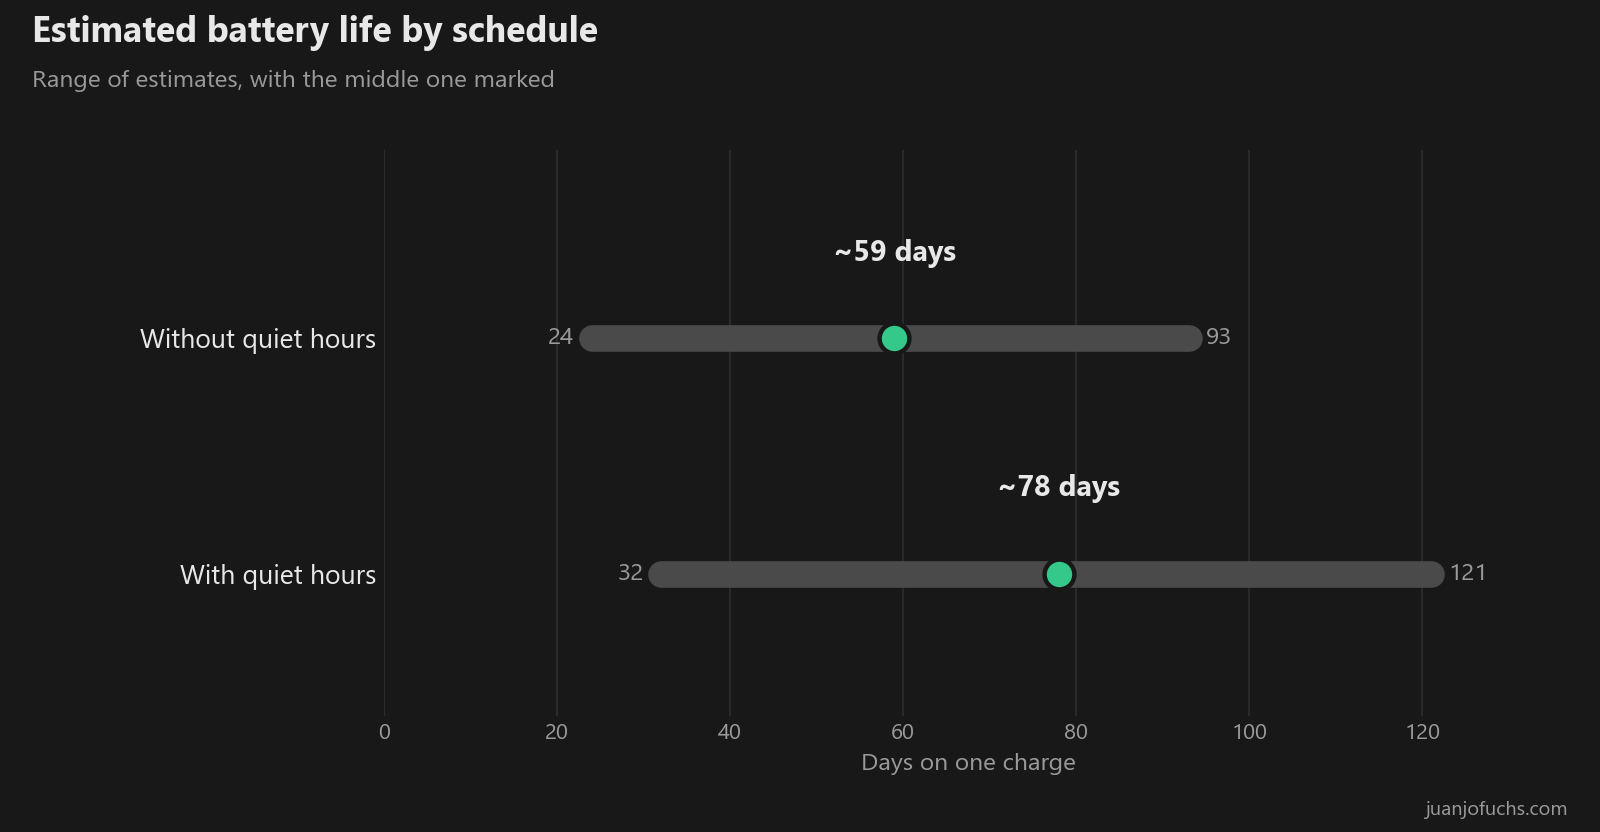
It runs on a 2000 mAh battery, and the board spends most of its time asleep, only waking up to check for changes on predefined schedules. With my current setup, I expect the battery duration to be about 78 days with quiet hours and about 59 without, so quiet hours should stretch it from about two months to about two and a half.
What it cost me and what it gave me
I’d started with a budget of a hundred dollars tops, and that didn’t happen. The parts came to $204.29:
| Part | Paid |
|---|---|
| Waveshare 13.3-inch e-Paper HAT (K) | $176.59 |
| Seeed XIAO ESP32C3 | $11.72 |
| EEMB 2000 mAh battery | $15.98 |
| Parts | $204.29 |
The soldering kit and meter are tools I’ll reuse, not just for this project, so that’s an investment. I didn’t have those tools because I had never done this.
It also gave me this cool display, something I can play with and do more projects with, to display other things like suggesting movies from my watch list or showing some of my home devices like my thermostat sensors. And it gave me skills. I think I’ve learned some basics on how to solder now, and how to use a multimeter for very basic stuff. It also made me value this thing I have made, which is called the IKEA effect, “labor leads to love only when labor results in successful completion of tasks.”
Having AI made me go for that project I thought was too hard, it’s letting my imagination flow. Having guidance helped me get through the wiring and soldering, just as AI had helped me open my laptop and change its thermal paste. Now I’ve soldered a board and made a calendar that sits on my fridge.
What’s your hard project that you have been postponing?